
I’ve been working on rewiring my brain to understand how I go from Configuration Manager OSD, to the ‘pure cloud’ model of Autopilot and Intune.
So lets get some devices into Autopilot using the ‘Get-WindowsAutoPilotInfo’ where I first came aware of from Michael Niehaus blog.
More Information:
-
PowerShell Gallery: Get-WindowsAutoPilotInfo
-
Michael Niehaus https://oofhours.com
Assumptions:
- You have Windows installed and are now sitting at the OOBE.
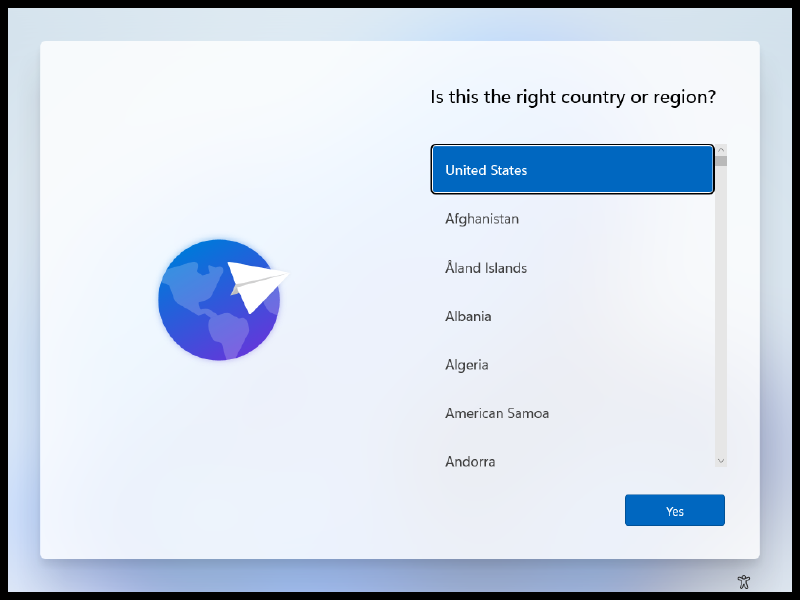
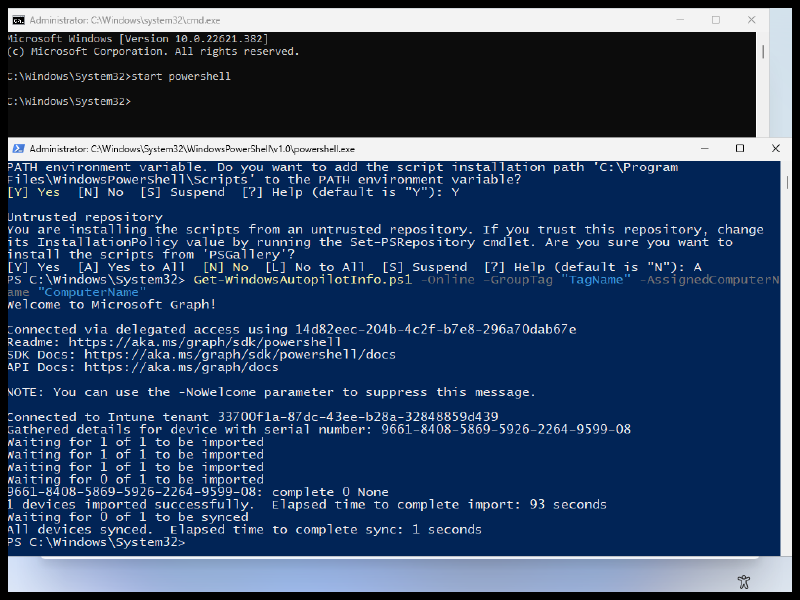
We’ll start from the OOBE of newly deployed machine. #
From the OOBE, Press (Shift+F10) #
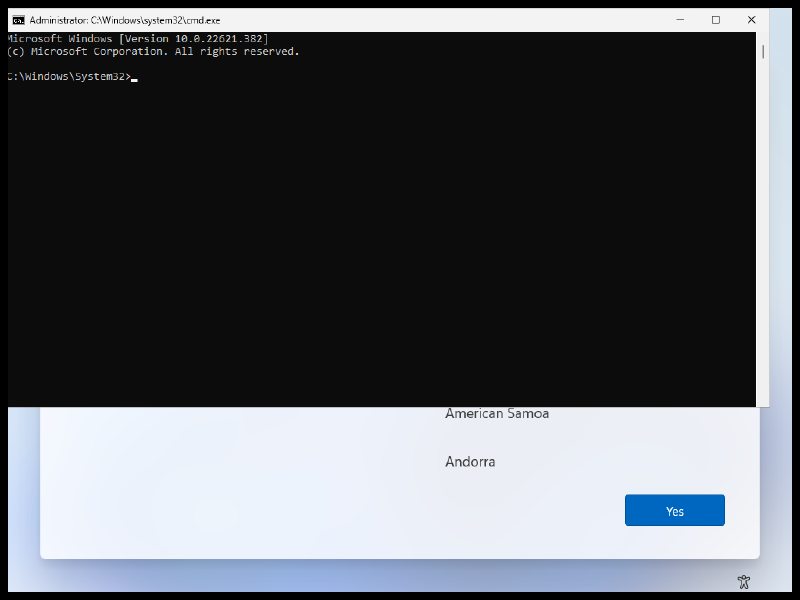
Within cmd, type: #
start powershell
We need to set the execution policy within Powershell. From the Powershell prompt, type: #
Set-ExecutionPolicy Bypass -Force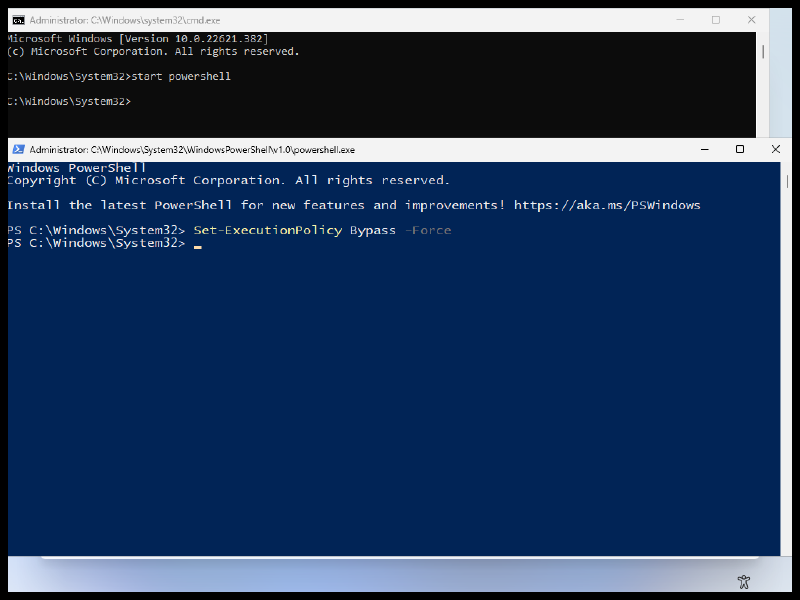
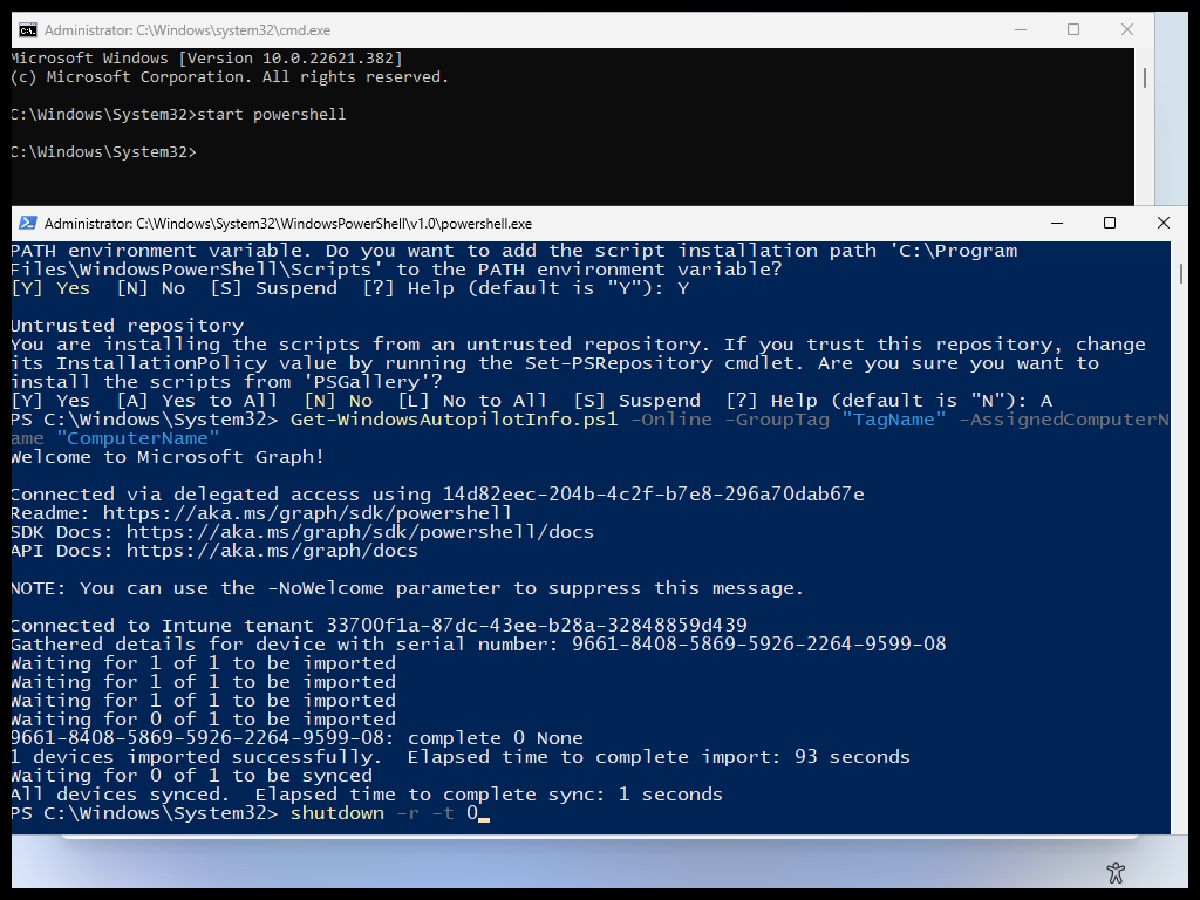
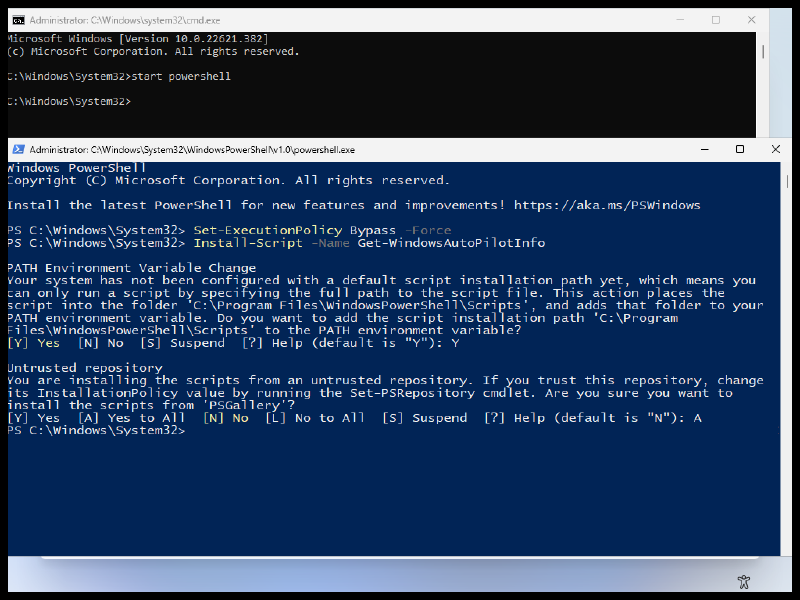
Install the ‘Get-WindowsAutopilotInfo’ script from the PSGallery #
Install-Script -Name Get-WindowsAutoPilotInfo-
When prompted, enter ‘Y’ to configure the PATH Environment Variable
-
When prompted, enter ‘A’ to trust installing a script from the ‘PSGallery’
Below is information on the ‘Get-WindowsAutoPilotInfo’ script #
- Most of the available Parameters
Get-WindowsAutoPilotInfo.ps1 [-Name] <String[]>] [-OutputFile <String>] [-GroupTag <String>] [-Append] [-Credential <PSCredential>] [-Partner] [-Force] [-Online] [-AddToGroup <String>] [-Assign] [-AssignedComputerName <String>]- Additional Information on what we will use
-Online [<SwitchParameter>]
     Add computers to Windows Autopilot via the Intune Graph API
-GroupTag <String>
     Specifies a tag for the device. Used for Automatic group assignments.
-AssignedComputerName <String>
Specifies the computer name that should be assigned when Autopilot deploys the device- We will use the below example command to test. Modify the ‘-GroupTag’ and ‘-AssignedComputerName’ for your own needs (These Parameters are not required, use as needed).
Get-WindowsAutopilotInfo -Online -GroupTag "GroupTag" -AssignedComputerName "ComputerName"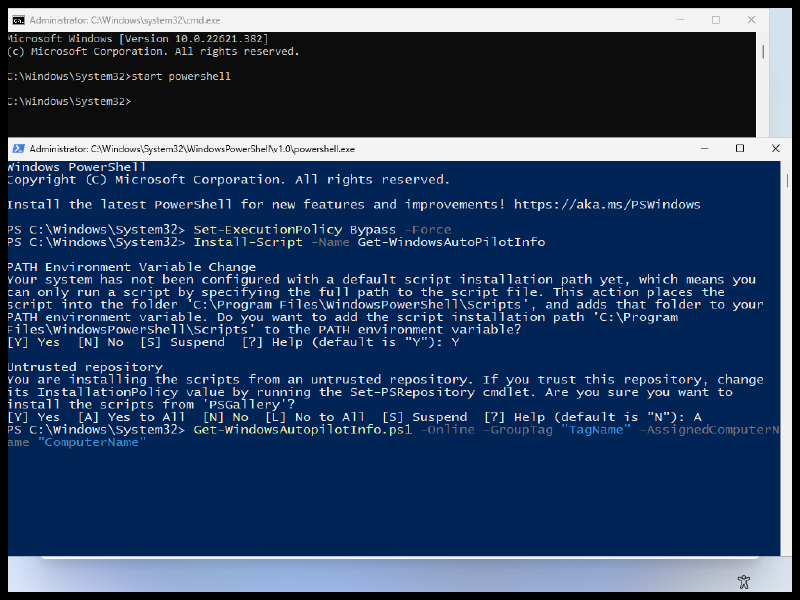
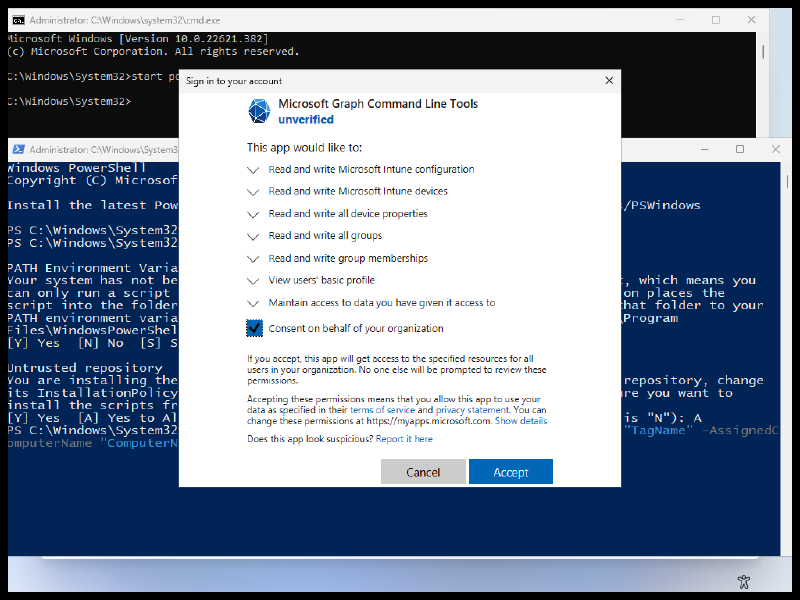
Authenticate and Approve Microsoft Graph permissions #
- A Microsoft Authentication prompt will appear. Use an account with permissions to import Windows Autopilot devices.

- If you haven’t already, you will need to Accept the Microsoft Graph app Permissions for you organization.
-
After successfully authenticating, the process will start
-
The script will Import the Device first, then perform a Device Sync.
-
If you use the ‘-Assign’ Parameter, the script will wait for the assignment to complete.
-
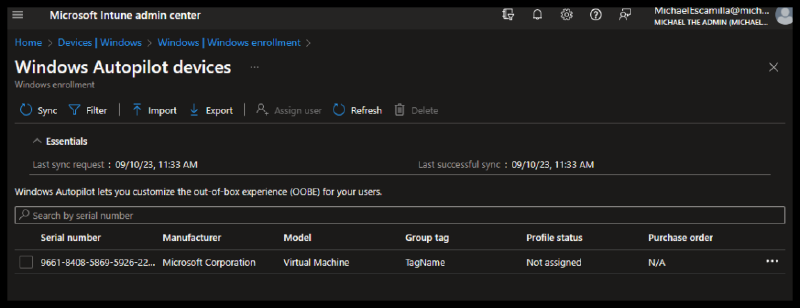
View the Imported device in the Intune admin center #
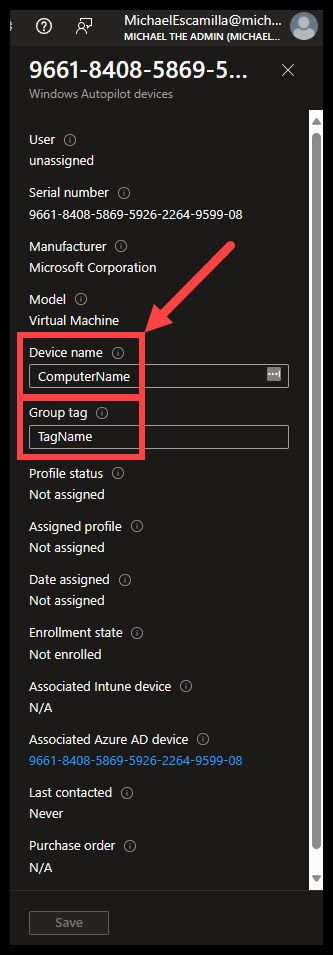
- After the process has completed, you can now view the device from within the ‘Windows Autopilot devices’ portal within the Intune Admin Center.
- If you click on the Device row, you can see that the ‘Device name’ and ‘Group tag’ should be applied if you supplied it during import.
Restart the device to pull down the Autopilot Profile #
shutdown -r -t 0
Success! #
- After the restart, the computer will check for updates.
- During this process, the computer will download the Autopilot Profile, and then restart one more time.

- After the restart, the AutoPilot should be loaded And you should now see any branding that you might have configured for your tenant.